Adding a serial port to a QNAP TS-473A NAS
When I got my NAS, I also got two NVME drives and some extra memory to fit in it, while fitting in the NVME drives I noticed a bunch of connectors on the top of the motherboard and one on the bottom. The only TWO connectors that were labeled in any meaningful way that I could guess their function LPC_CN1 and EC_SPI1. LPC_CN1 probably stands for Low-Pin-Count (connector 1), which is a general bus used for data storage, debugging, TPM modules and more, the second is an SPI bus maybe to program the BIOS flash?. While looking online for any information about internal connectors on QNAP devices, I stumbled upon many articles talking about serial ports on their QNAP devices. The QNAP website even has a guide on how to connect to a serial port, but for a different model and with an exposed serial connector on the back of the device.
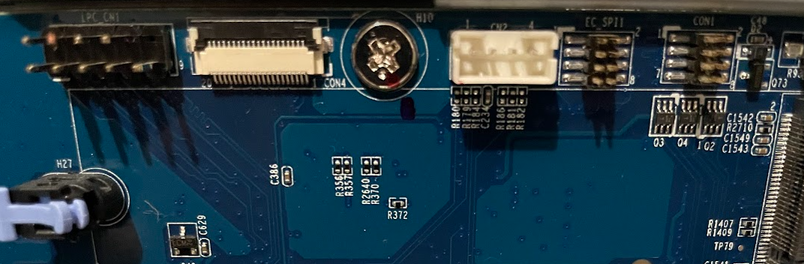
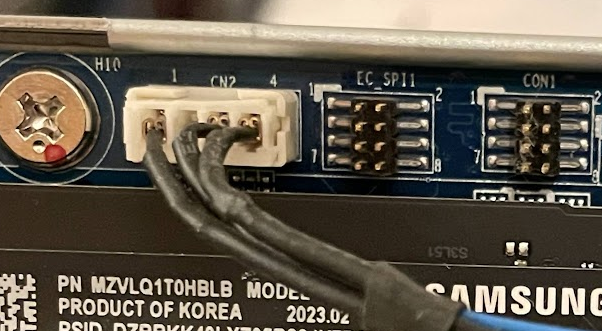
After some investigation I was certain that the 4-pin connector labeled CN2 was indeed a serial port and probed it with my multimeter, discovering its pinout. I also found later a post of someone who had the same exact model as mine and connected to the serial port and even confirmed that the BIOS menus can be accessed via serial. This was exciting news, as it had not been a week after I started using the NAS and being exposed to the horrifying OS that QNAP has (QTS/QuTS) that I was already looking to run a custom OS on the device and rid myself of the mess that QNAP call a “High-performance” OS.

Once I had made the decision that I would be installing a custom OS, I knew I would need to have a better way to connect to the serial console. Since the device does not come with a GPU, there is no video output and I would really like to have a method of accessing the local console directly in an emergency, so if I misconfigure a network setting fixing it would not involve removing the case cover and clipping on to the pins with jumper wires as I have been doing now while messing around.
I initially put some 2.54mm headers on a few wires and fed them through a hole in the back of the case, but I could already see in my mind the wires getting stuck in the fans or the insulation being broken from rubbing on the hole in a metal case and shorting causing a real headache. I searched online for a PCI bracket that would fit in the case and expose the serial console in a proper connector form, but what connector to use? I was thinking of a classic DB9 serial connector, a USB-A socket or even an RJ45 port like a switch but that would require an extra adaptor or special cable to convert the raw signal to USB and also feels wrong as the shape of the connector indicates to the user what protocol to expect.
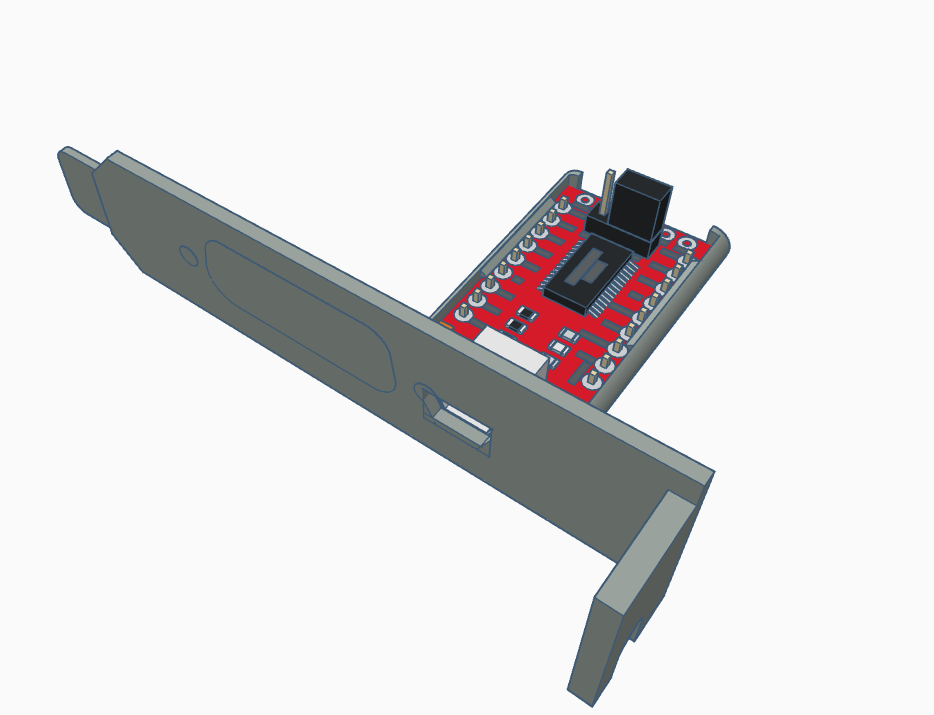
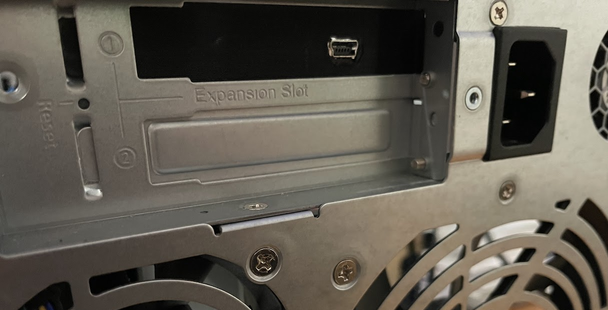
While working on a different project, I found my solution and it kills two birds with one stone, I could use one of those cheap serial to USB converters that have a 2.4mm header on one end and a mini USB port on the other end. The converter would sit inside the case of a PCI bracket and would expose a mini USB female connector on the back. This configuration means that to access the serial port I would only need the matching cable and not the whole serial to USB converter and a mini USB connector is identifiable as a USB device and not a host, so any person without prior knowledge could deduct it’s an output from the NAS and not an input.
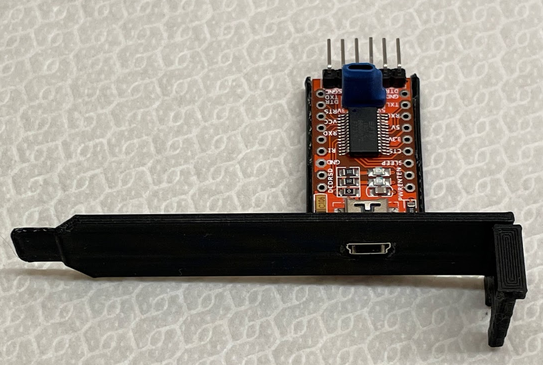
Since this a custom part, I decided to create the PCI bracket myself and design it to hold the serial converter keeping it secure and neat, since access to the serial port is rare, the bracket does not need to be made of metal and can be printed on 3D printer, which I own. I started with a generic PCI bracket designed to hold a VGA connector and plugged up the holes, I then designed a retention piece so the serial converter could be clipped into place without screws. All I had to do was to add a hole to access the USB connector and that’s it, send to printer! (download STL)
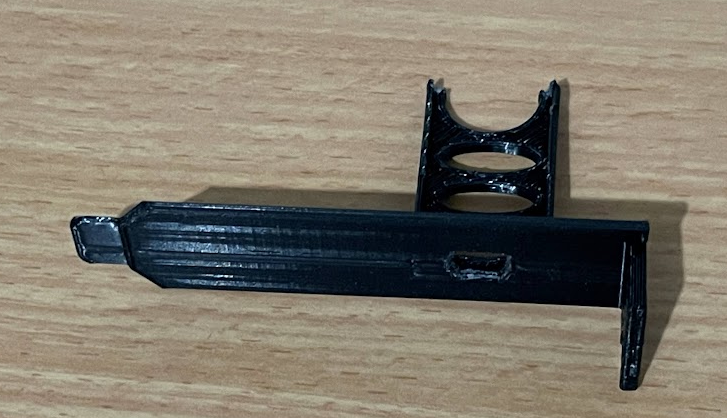
Once I had the bracket printed I started to assemble it. The tolerances were bad and I found that the retention part for the serial converter was too small and the was a bit of drooping where the USB connector hole was. Instead of reprinting the bracket, I took a knife shaved parts of it to fit, and secured the serial converter using some hot glue.
The next task was to create a cable that would on one end connect to the serial converter on the 2.54mm header and on the other side connect to the motherboard connector. I was not sure exactly what connector was on the motherboard, it looked like a 4-pin JST PHx type. Looking through my connectors box and other random cables I could not find the right connector but then I found an old internal speaker from an old PC that had the right connector but in a 5-pin configuration. Being lazy, instead of ordering the correct connector, I clipped the 5-pin connector from the speaker down to a 4-pin and checked the fit. The connector did not have the correct keying but it was a good fit and felt secure, so I made up a cable with a 2.54mm Dupont female header on one end and the modified speaker connector on the other.
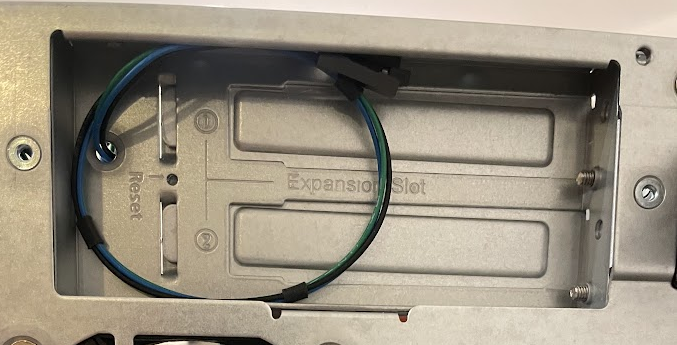
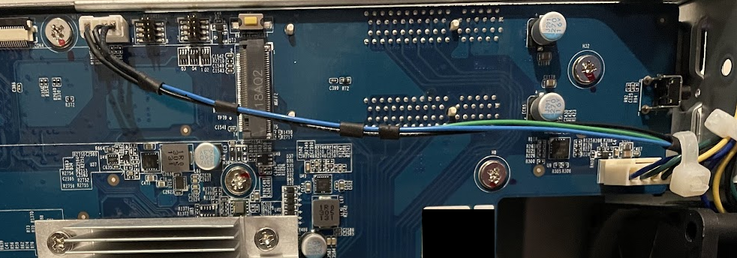
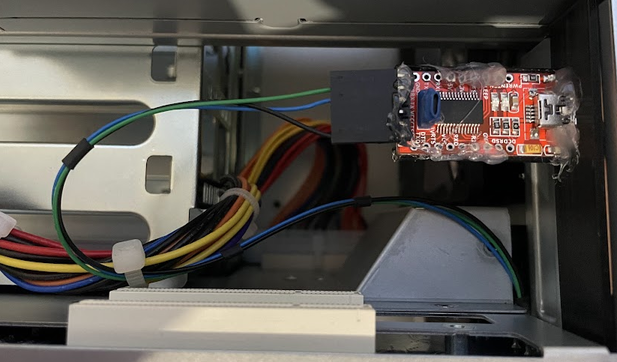
Once I had all the pieces it was time to assemble. In order to install a PCI bracket, the PSU of the NAS needs to be removed, but the cable ties stop it from coming complexly out. I gently moved it out of the way and put my custom PCI bracket in place. I then threaded the wire around the edge of the motherboard and secured the wires with cable ties so they would stay free of the fan and other components. Once everything was installed, I closed the case hoping to never needing to open it again (which I did end up opening again to remove the USB DOM and explore some components). And that’s all, to access the local shell on the NAS is as easy as connecting a cable and opening your favorite terminal software.
I was having a fun thought of putting an ESP8266 or similar and having the serial console exposed over WiFi to my local network, but that would defeat the purpose of a low-level no-configuration interface to the NAS.